Tag Archives: fabric dyeing

Life’s a bleach and then you dye; project 24

Standard
Life’s a bleach and then you dye; project 24

I was feeling a bit rocky physically over the weekend (and still am), so my belated craft is a fairly simple one. I’ve been seeing some Pinterest pins on tie-“dyeing” with bleach, so I thought that would be a good choice for yet another shirt that had been rack-wrecked with an ill-placed drip of salad dressing. I’d been putting off doing this shirt, because it was pretty much brand new, and I love the color so much, and I didn’t want to do something that would render it completely unwearable.

I loved the way using rubber bands and little glass whats-its made such intricate medallion-like patterns on the silk scarves I dyed a while back, so I placed 5 around the V-neck in the front of the shirt. Following the gathers that made, I pinched the fabric in folds all the way down the front of the shirt, from the center on out. I had a couple of binder clips at hand, so I fastened them that way, just in a couple of spots.

I thought it would be cool to leave the back unbleached, so I put some bubble-wrap between the front and the back. (When I’m painting or using a bleach pen, I usually use a cereal box, but I was afraid some of the color would leach from the box onto the shirt with this one, so I went with the bubble wrap).

Here it is ready to dip into the bleach solution:

I really need to clear an actual crafting surface to work on. Really.

The bleaching directions I got from this DIY project (found via Pinterest): http://honestlywtf.com/diy/diy-bleach-tie-dye/ (And boy, do I want to do a shirt like the one done here!)

And my advice if you use this method to do a shirt, pay attention to her suggestions about working outdoors and gloves. I was Miss Half-Ass-It, and it wasn’t that pleasant. And the fumes could be seriously not good — I used the exhaust fan in my bathroom as I worked, but it still was headachy.

The two things I think I’d do differently (besides working outdoors and wearing gloves): use a bigger vessel for the solution and clip the pleats all the way along their length. As for the first, I used the bathroom sink, a smallish oval, so I had to keep moving the shirt back and forth to be sure everything got in the bleach. When I checked for color, the back hem got into the bleach too, so I didn’t end up with the full unbleached effect on the back. This shirt was dip-and-check-dip-and-check, rather than the 30-minute resting period of the bleach pen. I couldn’t say exactly how long it was in the bleach solution, but barely over a minute or two. I rinsed it, pulled out the clips and glass bits, then ran it through the wash.

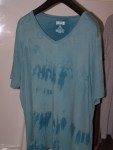
Here’s the front, once dried:

Bleach tie-dye

I’m a little disappointed by the medallions, which are just kind of quavery little rounded boxes. They may need some sort of embellishment. The resist effect only was clear where I had the clips in. I’d do it all the way down another time, but I still think this came out okay.

Jury’s still out on whether I feel there should be more embellishment of some kind on the front.

And here’s the back:

Looks cool, especially close up, but someone walking behind me down the hall at work yesterday thought I’d fallen into a puddle or something.

I learned a few things from this, and got a wearable shirt out of the deal, so it’s pretty much a success.

Let’s try this again…

Standard
Let’s try this again…

Some of the first pins I saved on Pinterest were various things you could do with t-shirts, and I finally got around to a couple of the ones I’ve been wanting to try. This is one of those crafts I’ve done in stages: I dyed two tees turquoise in the same dye bath as my jeans I did a long while back. Neither one was pure white; one was a print tee I got at the Mart of Wal for $3, and the other was a Race for the Cure tee with about a million logos all over it.

I’d tested cutting a few strips off each to see if they would curl — some tees, like the thick cotton ones Lands’ End has (or had at the time I bought mine, about 7 years ago) don’t curl. But both these did well. I finally got around to cutting all the strips — still attached at the sides, so essentially a big circle of fabric about 1″ wide — on Wednesday at the art gathering I attend most weeks.

Sunday I finished them, trying out several different kinds of ways to bind the strips together. Just to be sure, I sewed them together, then covered those bits (and the parts that wouldn’t curl because there was a seam) with other fabric.

I braided 3 different colored strips of yarn made of sari silk and wound them around one set of tee strips. Bright and colorful, but the strips of silk are very ravelly, so there’s a kind of hairiness that obscures the fact that it’s braided to some degree. (The tee strips don’t ravel, by the way, since they’re knitted, not woven.

“Opera length” schmatta necklace.

I have discovered that sari silk yarn will shed like a bastard, so be advised. You will wear this long after you wear it.

The print shirt had side seams, which made it a little tougher to get a smooth look. I made one long necklace with strands from the seamless tee and the one with seams, letting those land wherever they would, and I wound a tee strip around the loops.

The color is actually a lot more vivid than in this picture; it’s just like the rest of the items in this post.

The next item I made from the print tee, I doubled the loops so all the seams were together, then put a stitch in to keep it in place. I hid that behind a big button, and now I have either a shorter necklace or a bracelet that wraps around my wrist 2 or 3 times. (I go for 3.)

I like big buttons, and I cannot lie

In fact, the “opera length” necklaces can be doubled too, like such:

The wrap holding the loops on this one is a 5.5 mm yarn with a honeycomb pattern between the edges.

And to wind this up, two more bracelets I made from the sleeves of the bigger tee — the print had cap sleeves that didn’t allow cutting across the knit. (And this was something I added on my own; none of the tutorials I saw used sleeves — now if I could just figure out a way to use the part from armpits to neckline…)

The closure here is the border from an Indian silk tunic I’m working into another project. I wish it were rounder, but I’ll get that figured out at some point.

…Aaaannnnddd, that’s a wrap.

Dammit! Lost post!!!

Standard

I am too tired to rewrite this.

Tutorials here: http://www.wholeliving.com/133536/recycled-craft-t-shirt-necklace

Results here:

Image

Bracelet version (my own variation):

Image

I did a number of versions of these, and can post more pics and more about what I did when I am not so damn tired and crabby.

First one’s free, kid…

Standard
First one’s free, kid…

So regular readers of this blog may remember (::cough::) that I was somewhat (::cough::) cranky on Sunday and not feeling the big creative love until sometime around 6 or 7 pm. Then I made a tie-dyed scarf with a new medium, plain ol’ food coloring.

Well, I got all charged up again and ended up making another five in one day, and I am loving them to pieces.

I love when that happens.

Here they are, with the one that started the whole frenzy.

The dye packages have little charts telling you how to make other colors, so I tried my hand. My first attempt was stormy blue. I didn’t stir the color mix up after pouring in the hot water, so I got this scarf that still has separate patches of the color component — and I love it.

Imperfection FOR THE WIN.

The apricot scarf I stirred the component colors better, but due to the small container dye method (which I love), it still has a nicely watercolor effect. Apricot, you may be fascinated to know, comes from mixing GREEN AND PINK.

WAIT. WHAT?

Will try to post more colors another time.

This weekend will be interesting. I’ve got a bunch of things yet to make for Wiscon, plus getting the house in order for a guest in a week. Must also sneak over to my flea market booth and see how I’m doing!

The Fast and the Furious: Project Post #12

Standard
The Fast and the Furious: Project Post #12

Even though I said I didn’t want to, I started sewing on one of the projects again. Made some progress, but realized I couldn’t possibly get it done today (tonight), so I grumped around and finally decided to try tie-dyeing a silk scarf with food coloring. I’ve never dyed with it before, but a crafty friend had told me she’s done it, so I thought I’d give it a try. I bought both kinds of food coloring, but went totally with neon for this one.

Everything I used, except water, vinegar and the microwave.

So basically, I just kinda made this system up. I did use the tie-dye method I’d learned in the class where I made last week’s project, the scarf with felting. Made little bobbles of glass pebbles tied off with rubber bands, most with one, but a few with two or more. I think I like the ones and twos best.

I have nothing witty to say here. Try back later.

I really liked the way the ligatures turned out in the tie-dying in that class, but was disappointed that I seemed to have lost those subtle details completely in all the sudsy water rolling and rolling to felt the fuzzy bits on. So I’d been wanting to use that method another time.

Or this one, either.

Wasn’t quite sure what I wanted to do from this point, where I’d squirted most of the bobbles with food coloring. Then I checked out the chart on the back of the boxes telling how to make different colors, and oooooohhh. Due to my ongoing love affair with teal, I picked that color and mixed the blue and green as directed for cake batter. I mean, I dunno. Then I poured on 1/2 cup of boiling water onto those color drops as it said in the egg dyeing directions, and I splashed a bit more vinegar than the amount they said (because I hadn’t noticed that they called for vinegar at all). Then I poured the boiling water with color onto the whole scarf and put it into the microwave for a minute. Again, I dunno. I just made this up as I went along. I might’ve given it more time, but I got nervous when I peeked at it and it was steaming heartily. (A touch of PTSD after burning the silk/wool scarf, maybe?) So I took it out and let it sit for a while.

Dunno if the steam will show at this resolution, but trust me.

Once it cooled down, I undid all the ties and hung the thing up. I’m pretty damn excited about it. Love that I can mix up some cool, non primary colors.

And there it is, fresh out of the microwave.

You can see the designs the ligatures made.

Neat, huh? The tighter you get the rubber bands all around the scarf, the more of those subtle markings you'll see.

And one more bitchin’ closeup.

So need to play with these colors some more. So so cool....

This is so what I needed today: a project that gets me fired up again and has me plotting what other things I want to try. I have a great idea, but I’m not sure how to execute it (uh-oh. That’s always the way that leads to disappointment).

Mr. Pointy

Standard
Mr. Pointy

I think I may have made up for yesterday’s complete worthlessness.

Today I finished my project, ironed and then washed a dozen silk scarves. No, that’s not out of order. I wanted to use the iron to set the color before washing, which is what the instructions are for the oil paints for fabric that I sometime use. I figured it was good general advice. Ironed a few of them, and have more still drying last time I checked.

I washer-felted 4 sweaters: 3 that I bought at Goodwill in Austin, and one that I’ve had for a very long time. My bathroom now smells like a wet sheep. Did a bit of wet-felting with some wool roving that I had, overlaid with “silk handkerchief,” a very filamenty silk that comes from a cocoon. It doesn’t look like it’ll be sticking to the felt cuff I wanted to make, so I’ll have to pull out the sharp and pointy things again. And last, I got out the seam ripper and removed the sleeves from an Indian ladies’ Kameez that I bought in Austin at the thrift store. gorgeous silk overlayer, which has started to shred a bit. I am not sure what I’ll make of them. Not long enough to sew together to make a scarf. Might make a good back panel overlay for the denim vest I bought, also from a thrift shop.

Oh wait! One other thing: I ironed some designs I’d painted on this pullover hoodie I’m doing an upcycle on, then tossed it in the washer. That one feels like a disappointment in the making, so I haven’t exactly been powering through working on it. I did some stitching at the edges and decided I hate it. I used oil paint crayons to do the designs and wasn’t too careful, so it got all over my hands, so there are smears of color in places where I didn’t intend. I want to try to fix it so I want to wear it, but so far no luck. So it was quite the frenzy of activity once I got moving. Now I am done with the moving, because my legs and feet are in a lot of pain that rest and naproxen aren’t helping at all.

Okay, but enough about all that. Project time!

Back in March I took a 3-hour class that involved some nuno felting techniques, though it wasn’t the standard all-over covering of felt that the term nuno conveys. Our first step was dyeing our white silk scarf blanks. I learned a few goodies about tie-dyeing, using glass pebbles (the kind you use in floral arrangements) inside a twist of rubber band fastened silk, and adding color directly to the bundle with cattle syringes bought at Farm & Fleet (no pointy needles, however). I really liked the effect I got, but I kinda feel like it got lost or hidden during the next phase, the wet felting.

I chose lavender and lilac to go with the glasses frames I had ordered (even before I had my eye exam, I loved them that much). Chose dyed roving in purple, periwinkle and an inky shade of blue. Then we wrapped them up around pool noodles (Obscure fact: I am in an imaginary band called the Pool Noodles with a dancer for NY City Ballet, whom I know only through Twitter.), poured on some sudsy water and rolled. And rolled and rolled and rolled and rolled, in my case. I had accidentally grabbed some mohair. Mohair will not stick to silk as wool will, unless it has some wool to fasten itself to. Well, it’s hard to see what’s working and what’s not when your work is wrapped around a pool noodle, so there was unwrapping, sighing, rewrapping, and rolling, lathering, rinsing, repeating. It was a bit frustrating, but the instructor helped and it improved things, and she also told me I could needle-felt the mohair into the piece.

So the needle felting is the part I did today. I would have preferred the wet felting to work. Needle felting punches the fibers through the silk, so you wind up with a funky whiskery thing happening on the other side of the fabric. The fabric puckers too — not that it’s terrible — the felting of fibers on top of the wool actually makes little creases and folds as it catches during the rolling around process. Another reason it’s not ideal is, the design gets smaller and the funky curly mohairs get punched into submission so you lose that cool look. But punch ’em down I did, and I still like the result a lot, even though there were things I liked that got lost along the way. I finished off the project by ironing the scarf, since I was already ironing a bunch of scarves.

I have a friend who has long said, “If you learn one good thing in a class, you’ve gotten your money’s worth.” I got two. The little glass marble bundle technique of tie dyeing, and something I feel like a complete idiot for never knowing: once you’ve done all your dyeing and abusing of your scarf, a rinse in water with some fabric softener will bring back that deliciously silky feeling to your silk. Seems so obvious, yet it has never occurred to me.

Anyway! Show and tell time!

Hair of mo. You can see how curly it is, as this bit did bond to the silk and wool.

And here's a loose piece I needle felted into the scarf.

Good shot of the whiskery bits that come through the reverse when you needle felt.

Aaand the finished project, after ironing.

Soft and pretty, yes?

I would show how it looks on, with the glasses, but I keep nodding off over the keyboard, so I think that’s a message. I’ll try to remember to snap a quick shot of me wearing the scarf.

Goodnight, y’all!

Dye dye DYE!!!

Standard

Paying attention to wash cycles is NOT my strong suit, people! But I have some items in the wash machine to dye, and I have to keep it from going into rinse and keep the wash cycle going for 50 minutes to an hour or so. Which is why I’m sitting in my hallway (the washer/dryer are at the garage end of the hall) with the timer set every three minutes so I can track how long a wash cycle takes.

This isn’t a project at this point, but it’s a little prep work for one that will happen later. And also just rescuing (I hope!) a pair of jeans that are a little too weatherbeaten to wear to work on the days when we’re allowed to.

I’m using iDye, which I’ve never used before. In fact, this is the first time I’ve ever dyed anything with dye that is supposed to be used for that purpose. Never dyed anything in the wash machine before. I hope it’s as easy as the packet claims! Though I do generally trust Dharma Trading.

ACK! Good thing I was paying attention. It started to drain way before I would have thought based on what the dial setting looked like. Pays to be neurotic sometimes…